UV DTF transfer is revolutionizing garment customization, delivering bold, durable designs on fabric, mugs, hats, and more. To maximize color fidelity and adhesion, explore UV DTF transfer techniques that optimize ink curing, film handling, and substrate compatibility. Having the right UV DTF printing tools, paired with a solid Direct-to-film transfer process, helps you achieve sharper edges and vibrant tones. Common challenges fall under DTF transfer troubleshooting, from undercured ink and edge feathering to adhesion issues on tricky blends, heat consistency, and fabric texture. Consider UV DTF vs traditional DTF to guide substrate choices, equipment needs, and production pace, especially for high-volume runs.
This advanced, UV-curable film transfer approach blends a film-on-ink workflow with rapid curing, producing vibrant designs on a wide range of textiles. In practice, the process involves printing onto a specialized film, applying heat and pressure, and then transferring the image to the garment, a method readers recognize as modern direct-to-film production. By using semantically related terms such as film transfer workflow, UV-curable inks, substrate preparation, and precise heat pressing, you create content that serves both readers and search engines without overreliance on any single phrase.
What is UV DTF transfer and why it matters
UV DTF transfer combines the principles of direct-to-film printing with UV-curable inks, delivering vibrant, durable designs to a wide range of substrates. By printing onto a transparent or tinted film and using heat and pressure to transfer the image, you can achieve sharp edges, high color fidelity, and quicker handling times thanks to instant UV curing. This makes it particularly well-suited for apparel, mugs, hats, and other items where durability and wash-fastness are important.
Understanding UV DTF transfer is essential for maximizing color range and adhesion. The technique leverages UV-curable inks that cure the moment they’re exposed to ultraviolet light, reducing post-print drying steps and enabling faster production cycles. When paired with a direct-to-film workflow, UV DTF transfer can produce strong, long-lasting results on cotton, blends, and certain synthetics, with bright colors and excellent resistance to cracking or fading when properly cured.
UV DTF transfer techniques: best practices for color and adhesion
Practicing UV DTF transfer techniques starts with a color-managed workflow. Use ICC profiles designed for UV inks and verify color accuracy on representative swatches before committing to production. Strong contrast imagery, clean edges, and careful attention to substrate color ensure that the final print remains faithful to the design, especially on white or light backgrounds where UV inks shine.
Layer management and curing order are crucial for durable results. If you’re combining multiple colors, ensure each layer cures fully before applying the next, and consider a white underbase on dark fabrics to preserve vibrancy. Proofing at high resolution (up to 300 DPI or more) helps you spot feathering or edge softness early, while planning for potential warm-tone shifts on certain fabrics keeps proofs realistic.
UV DTF printing tools: essential equipment for reliable results
A solid UV DTF printing setup starts with a printer capable of handling UV-curable inks or a conventional DTF printer configured for UV inks. Pair this with a reliable UV-curing system, whether a UV LED lamp or a dedicated curing station, to ensure complete hardening of the ink film before handling. The choice of film and adhesive matters too, with UV-compatible films and adhesives selected to match substrate and heat-press settings.
Complementary tools include a robust heat press with precise temperature, time, and pressure controls, lint-free cleaning supplies, and weeding tools to prepare the print area. RIP software and color-management utilities help maintain consistent output across runs, while maintenance routines—such as cleaning print heads and verifying calibration—keep UV DTF processes efficient and predictable.
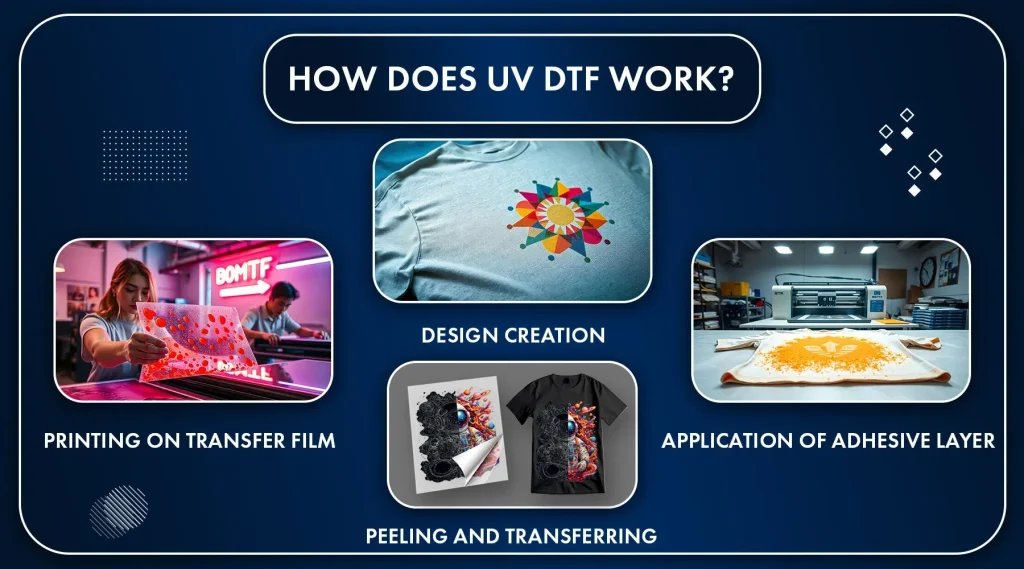
Direct-to-film transfer process: step-by-step workflow for UV inks
A typical Direct-to-film transfer process with UV inks begins in design and proofing. Prepare artwork with a possible white underbase for light fabrics and run proofs to confirm color accuracy. This stage sets the foundation for accurate color reproduction and crisp edge definition.
Printing, curing, and assembling follow. Print the design onto UV-curable film, cure immediately with a UV lamp to fix the ink, then laminate the printed film with the DTF adhesive. Position the film on the garment and press at the recommended temperature, time, and pressure. A steady, even press combined with proper peel timing ensures long-lasting adhesion and minimal edge curl.
DTF transfer troubleshooting: diagnosing and fixing common issues
Even with a solid setup, DTF transfer troubleshooting is an ongoing part of producing reliable results. Fading or color shifts can stem from improper ICC profiles, insufficient curing, or substrate incompatibility. Recalibrating the printer, refreshing color management, and adding a white underbase for dark fabrics are common fixes.
Other frequent problems include ink smears, incomplete cure, or poor adhesion. Check curing intensity and distance, verify that the film is fully cured before handling, and ensure the adhesive and substrate are compatible. Edge bleeding or ghosting can be addressed by sharpening masks in the design and securing the edge during pressing to prevent movement.
UV DTF vs traditional DTF: choosing the right approach for your shop
UV DTF transfer offers the advantage of faster curing, reduced drying time, and potentially sharper color reproduction due to the instantaneous cure of UV inks. In contrast, traditional DTF relies on heat-activated powders and moisture-based inks, which can yield different color dynamics and longer production times. Depending on your substrates and color requirements, UV DTF can deliver stronger durability and quicker turnaround for certain applications.
Cost, maintenance, and substrate compatibility are important considerations when deciding between UV DTF and traditional DTF. UV inks may require specialized curing equipment and routine calibration, but they can simplify post-processing and reduce drying delays. weigh production volume, substrate behavior, and color needs to determine whether UV DTF transfer or traditional DTF best aligns with your business goals.
Frequently Asked Questions
What is UV DTF transfer, and how does UV DTF vs traditional DTF compare?
UV DTF transfer uses UV-curable inks printed on a film and cured instantly with a UV light source before transferring to fabric. Compared to traditional DTF, it delivers sharper detail, brighter color fidelity, and faster turnaround thanks to instantaneous curing. Success depends on substrate compatibility, correct adhesive, and proper curing procedures.
Which UV DTF transfer techniques are most effective for cotton fabrics?
Key UV DTF transfer techniques for cotton include using a white underbase on dark fabrics, ensuring complete curing between color layers, maintaining edge crispness, and verifying substrate compatibility with the chosen adhesive. Always test on representative swatches and adjust curing distance and press settings as needed.
What UV DTF printing tools do I need to start a UV DTF transfer project?
Start with a UV-capable DTF printer (or a standard DTF printer with UV inks), a UV curing lamp, DTF film and adhesive, a heat press with adjustable temperature and time, weeding tools, and RIP/color-management software to control profiles and layout.
What are common issues in DTF transfer troubleshooting for UV DTF transfer, and how can I fix them?
Common issues include ink smears, incomplete cure, weak adhesion, and color shifts. Fixes: verify curing intensity and distance, ensure the film is fully cured before handling, confirm adhesive compatibility with the substrate, pre-press to remove moisture, and confirm correct color profiles and printer calibration.
What is the direct-to-film transfer process for UV inks, and what should I consider during setup?
The direct-to-film transfer process for UV inks involves designing, printing on a UV-curable ink film, curing the print, laminating with adhesive, and pressing onto the garment or substrate. Consider substrate compatibility, curing requirements, adhesive choice, and temperature/pressure settings to achieve durable transfers.
How does UV DTF vs traditional DTF affect color quality, durability, and workflow?
UV DTF typically offers brighter colors and sharper edges with instant curing, reducing drying time and handling. Traditional DTF relies on powders and moisture-based inks with longer cure times and different color dynamics. Choose based on substrate, volume, and maintenance needs, and validate with proofing on representative fabrics.
| Topic | Key Points |
|---|---|
| What is UV DTF transfer | UV DTF transfer combines UV-curable inks with a direct-to-film workflow to transfer designs to fabrics and other substrates using heat and pressure, delivering sharp images, strong color fidelity, and fast curing. |
| Understanding the UV DTF transfer workflow | A typical workflow includes design, printing, curing, assembling, and pressing, with each stage affecting the final result. |
| Design and color management | Create high-resolution designs and use a color-managed workflow with ICC profiles for UV inks; test on representative swatches; plan for slight warm-tone shifts and ensure contrast and edge clarity. |
| Substrate selection and preparation | Substrates include cotton, cotton blends, polyester blends, and some synthetics; pre-wash fabrics, ensure dryness and wrinkle-free; surface prep and light pre-press for flatness. |
| Printing techniques | Cure instantly with a UV lamp; check ink coverage and edge crispness; manage layer curing; use white underbase on dark fabrics; ensure high-res artwork (≥300 DPI). |
| Equipment and tools | UV DTF printer and curing system, UV inks, DTF film and adhesive, heat press with temperature control, weeding tools, RIP software for color management. |
| Step-by-step workflow | Design/proofing → Printing → Curing → Adhering/assembling → Pressing → Peeling/finishing → Optional post-cure. |
| Troubleshooting | Fading/color shift; ink smears; poor adhesion; bleeding/feathering; underbase issues; substrate distortion; ghosting. Address by color management, curing adjustments, adhesion checks, and proper press settings. |
| Maintenance and efficiency | Regular maintenance of printer heads and rollers; test prints on exact substrates; keep a settings log; train operators and ensure safe curing practices. |
| UV DTF vs traditional DTF | UV DTF offers faster curing and potentially sharper color due to instant UV ink cure; traditional DTF uses heat-activated powders and moisture-based inks, with different color dynamics and longer production times. |
| Advanced best practices and future considerations | Experiment with color profiles and heat-press conditions; stay updated on inks and adhesives; consider environmental and safety guidelines; test workflows for larger runs to maximize consistency. |
Summary
UV DTF transfer represents a powerful option for garment and product customization. With precise UV-curable inks and a well-managed DTF workflow, you can achieve vibrant, durable designs across a variety of substrates. Invest in quality tools, follow proven techniques, and stay vigilant about troubleshooting. Start with a small project to dial in color, adhesion, and curing, then scale up as you gain confidence. The ultimate goal is consistent, high-quality transfers that meet customer expectations and withstand wear and washing.


