
If you're in the custom apparel game, you've probably heard the buzz around DTF printing. It stands for Direct to Film, and it's quickly becoming the go-to method for transferring vibrant, detailed designs onto everything from cotton tees to nylon jackets. Unlike DTG or screen printing, DTF doesn't require pre-treatment or specialized inks for each fabric type, making it a versatile and cost-effective option for small shops and large operations alike. But where do you start? This guide walks you through the essentials, from picking your first printer to mastering the powder shake, so you can produce professional-grade transfers without the trial-and-error headaches.
What Exactly Is DTF Printing?
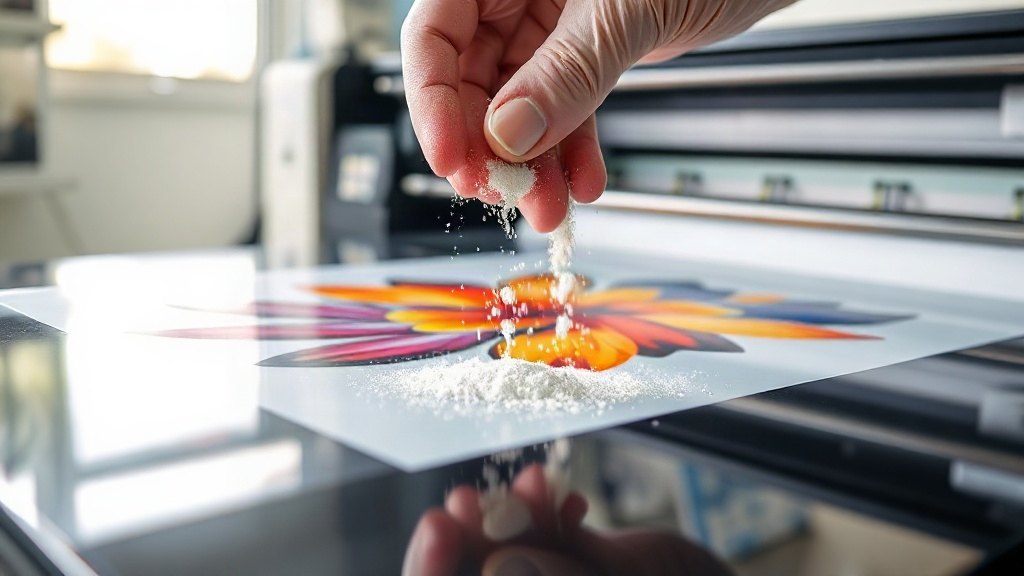
At its core, DTF printing involves printing your design onto a special PET film using a modified inkjet printer. The printer lays down a layer of white ink (for opacity) and then color inks (CMYK) to create the image. While the ink is still wet, you sprinkle a thermoplastic powder over it, shake off the excess, and then cure the film in a heat press or oven. The result is a flexible, stretchable transfer that can be applied to almost any fabric using a heat press. The magic is in the powder: it acts as an adhesive that bonds the ink to the fabric when heat-pressed.
One of the biggest advantages of DTF is that it eliminates the need for weeding. If you've ever spent hours cutting and weeding vinyl, you know how tedious that can be. With DTF, you print, powder, cure, and press. That's it. The process is also incredibly efficient for full-color, photographic designs because there's no color separation or layering required. Plus, the transfers can be stored for months, so you can print on demand and press when you need to fulfill an order.
Setting Up Your DTF Workshop: What You Really Need
Before you dive in, you'll need to invest in the right equipment. The good news is that you don't need a massive budget to get started. Here's a breakdown of the essentials:
- DTF Printer: You can convert an Epson printer (like the Epson L1800 or P800) with a DTF ink system, or buy a dedicated DTF printer. Dedicated printers often come with a white ink circulation system to prevent clogs, which is a huge time-saver.
- DTF Inks: These are specially formulated pigment inks that include white, cyan, magenta, yellow, and black. They must be compatible with your printer's printhead.
- PET Film: This is the transfer medium. It comes in sheets or rolls, and you'll want a film that's designed for DTF printing. Double-sided film is available, but single-sided is more common for beginners.
- TPU Powder: Also known as hot melt adhesive powder. It comes in different particle sizes; finer powder works better for detailed designs. You'll need a container for shaking and a way to reclaim excess powder.
- Heat Press: A good heat press with even pressure and accurate temperature control is crucial. You'll use it for both curing the powder and pressing the transfer onto the garment.
- Curing Oven (Optional): For higher production, a curing oven can speed up the powder melting process, but a heat press works fine for small batches.
- RIP Software: This software helps manage color profiles and white ink layering. Some printers come with their own RIP, but you can also use third-party options like AcroRIP.
Once you have your gear, set up a clean, well-ventilated workspace. DTF inks and powders can be messy, so designate a table for printing and powdering, and keep a vacuum or lint roller handy to clean up spills.
Choosing the Right Printer for Your Needs
If you're just starting out, a converted Epson printer might be the most budget-friendly option. However, these printers require regular maintenance to prevent white ink clogs. Dedicated DTF printers, like those from Ving or Prestige, are designed specifically for this purpose and often include automated cleaning cycles. They cost more upfront but save you time and frustration in the long run. Consider your production volume: if you plan to print dozens of transfers daily, invest in a dedicated machine. For occasional use, a converted printer can work, but be prepared to run daily nozzle checks and cleanings.
The Step-by-Step DTF Printing Process
Now that you have your equipment, let's walk through the actual printing process. It's a series of steps that, once mastered, become second nature.
1. Design Preparation
Start with a high-resolution image (300 DPI is ideal). Remember that DTF transfers are printed in reverse, so mirror your design horizontally. If you're using RIP software, it will handle the mirroring automatically. Also, consider the white underbase: your RIP software will generate a white layer underneath the color inks to ensure the design pops on dark garments. For light garments, you might reduce the white ink to keep the transfer thin and soft.
2. Printing the Transfer
Load your PET film into the printer, making sure it's the correct side up (usually the matte side). Send your design to print. The printer will lay down the white ink first, followed by the color inks. It's fascinating to watch the image appear, but resist the urge to touch it! The ink is wet and can smudge easily.
3. Applying the Powder
While the ink is still wet, generously sprinkle the TPU powder over the entire design. You can use a shaker bottle or a scoop. Then, tilt the film and gently shake off the excess powder back into your container. You want an even coating of powder adhering to the wet ink, but no clumps. A common mistake is to apply too much powder, which can lead to a rough texture after curing. Aim for a thin, consistent layer.
4. Curing the Powder
Now you need to melt the powder. You can do this in a heat press set to around 320°F (160°C) for about 2-3 minutes, or in a curing oven. If using a heat press, place the film in the press with the powder side up, and cover it with a protective sheet (like Teflon or parchment paper). Apply light pressure. The powder will melt and become glossy. Once melted, remove the film and let it cool. The transfer is now ready to be pressed onto a garment, or it can be stored in a cool, dry place for later use.
5. Pressing onto the Garment
When you're ready to apply the transfer, preheat your heat press to 320°F (160°C). Place the garment on the press, and position the transfer on top with the design facing up. Cover with a protective sheet and press for 10-15 seconds with medium pressure. Then, while the transfer is still hot, peel off the film. You can do a hot peel or cold peel depending on the film type; most DTF films are hot peel, meaning you remove the film immediately after pressing while it's still hot. After peeling, give it a quick second press for 5 seconds to ensure the ink is fully embedded into the fabric.
Common DTF Problems and How to Fix Them
Even with the best equipment, you might run into issues. Here are some typical problems and their solutions:
- Clogged printhead: This is the most common issue with DTF printers, especially with white ink. Run daily nozzle checks and clean the printhead as needed. Use a humidifier to keep the environment around 50-70% humidity.
- Powder not sticking: If the powder doesn't adhere to the ink, it could be because the ink was too dry or the powder is too coarse. Try printing with a higher ink density or use a finer powder.
- Cracking after washing: This usually happens if the powder wasn't fully melted or if the transfer wasn't pressed long enough. Increase curing time or temperature, and ensure you're using enough pressure when pressing.
- Dull colors: If your prints look faded, check your color profiles and ensure you're using the correct ink settings. Also, make sure the white ink layer is sufficient for the fabric color.
With practice, you'll learn to troubleshoot these issues quickly and maintain a smooth workflow.
Is DTF Printing Profitable?
Absolutely, if you manage your costs and market effectively. The cost per transfer is relatively low, especially for small to medium-sized designs. A single A4 transfer might cost you around $1-2 in materials, and you can sell the finished garment for $20 or more, depending on your niche. The key is to offer something unique: custom designs, small batches, or quick turnaround. Many DTF printers also offer transfer-only services, selling sheets to other crafters who don't want to invest in the equipment. That can be a lucrative side income.
To maximize profit, consider these tips:
- Buy supplies in bulk: Inks, film, and powder are cheaper per unit when bought in larger quantities.
- Optimize your layout: Nest multiple designs on a single sheet to reduce waste.
- Market to local businesses: Offer custom apparel for teams, events, or corporate swag.
- Showcase your quality: Post videos of your process on social media to attract customers who value handmade quality.
Frequently Asked Questions About DTF Printing
What fabrics can I use with DTF transfers?
DTF transfers work on a wide range of fabrics, including cotton, polyester, blends, nylon, leather, and even canvas. The only exception is fabrics with a very rough texture or those that can't withstand heat (like some synthetic silks). Always test on a scrap piece first.
How do I store DTF transfers?
Store them in a cool, dry place away from direct sunlight. You can keep them in a plastic sleeve or a box. They typically last for several months, but humidity can affect the powder, so it's best to use them within a few weeks for optimal results.
Can I use a regular heat press for DTF?
Yes, a regular heat press works fine as long as it can reach the required temperature (around 320°F) and has adjustable pressure. You'll also need a protective sheet to prevent the ink from sticking to the upper platen.
Why is my DTF transfer cracking after washing?
Cracking usually indicates that the powder wasn't fully melted or the transfer wasn't pressed with enough pressure or time. Ensure your curing temperature is accurate, and when pressing, use medium to firm pressure for the full 15 seconds. Also, wait 24 hours before washing the garment, and turn it inside out.
Do I need a special printer for DTF?
You can convert a standard Epson printer to use DTF inks, but dedicated DTF printers are more reliable and come with features like white ink circulation. If you're serious about production, a dedicated printer is worth the investment.